
No Results Found
The page you requested could not be found. Try refining your search, or use the navigation above to locate the post.

by Nanny Bubby
Total Time:
30 minutesServes:
8The page you requested could not be found. Try refining your search, or use the navigation above to locate the post.
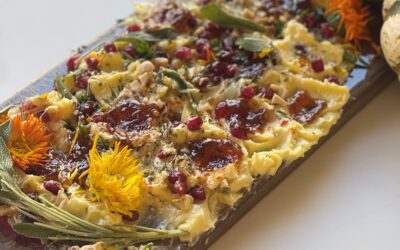
Thanksgiving Butter Board I love Thanksgiving! It is my favorite holiday. I love the traditions of...
The page you requested could not be found. Try refining your search, or use the navigation above to locate the post.
by Nanny Bubby
Total Time:
55 minutesServes:
5
Roasted Chestnut Soup By Melissa's Head Chef Tom Fraker I love everything Melissa’s Produce. The...

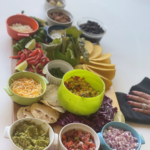
LEMON GINGER TURMERIC WELLNESS SHOTS 1 small Orange,...
LEMON GINGER TURMERIC WELLNESS SHOTS 1 small Orange,...
by Nanny Bubby
Total Time:
1 hourServes:
7The page you requested could not be found. Try refining your search, or use the navigation above to locate the post.
The page you requested could not be found. Try refining your search, or use the navigation above to locate the post.
The page you requested could not be found. Try refining your search, or use the navigation above to locate the post.
by Nanny Bubby
Total Time:
Serves:
The page you requested could not be found. Try refining your search, or use the navigation above to locate the post.
The page you requested could not be found. Try refining your search, or use the navigation above to locate the post.
The page you requested could not be found. Try refining your search, or use the navigation above to locate the post.
by Nanny Bubby
Total Time:
45 minutesServes:
4The page you requested could not be found. Try refining your search, or use the navigation above to locate the post.
The page you requested could not be found. Try refining your search, or use the navigation above to locate the post.
The page you requested could not be found. Try refining your search, or use the navigation above to locate the post.


Recent Comments